|
|
Allen's 1969 383 Stroker Restification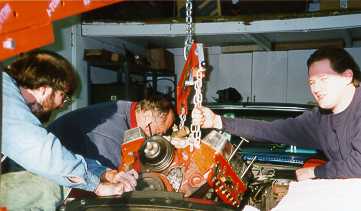 L to R: Myself, Perry Kincy and Jody Shapiro having too much fun Updated: 4/17/02 Best in 800x600 resolution 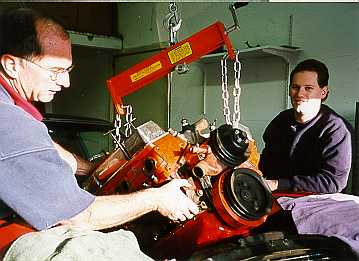 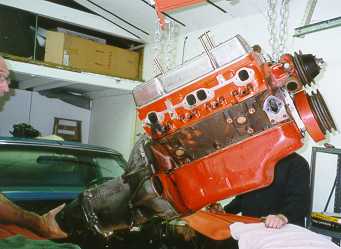 Allen's 383 Monster Rebuild Begins. Allen's 383 Monster Rebuild Begins.After spending 3 months and three grand on getting new heads, headers and a custom exhaust installed over the summer of '97, the bottom end of the 350C.I. L46 let go, blowing raw oil out of both tail pipes. What's a poor boy to do? Kudos to Jeff Mr. Muncie Stevens, Jody VortechMan Shapiro, Perry Mr. F-Stock Kincy and Diane Ms. NASCAR Hawkins for all their help and good humor in extracting the engine from the car. I couldn't have done it with out you! What started out as a simple engine rebuild over the winter of '97/'98 has ended turning into a complete frame-on "restification" effort, with a huge amount of work (and money) being expended on bringing up the rest of the car to a high level of safety, performance and reliability.  Before you can have Mike Blackstone stuff a forged Lunati 3.75" crank swinging 6" Eagle rods and SRP pistons wrapped with
Total Seal rings in .030" over bored cylinders, you first gotta to pull the engine out of the car.
Before you can have Mike Blackstone stuff a forged Lunati 3.75" crank swinging 6" Eagle rods and SRP pistons wrapped with
Total Seal rings in .030" over bored cylinders, you first gotta to pull the engine out of the car.With a huge Tnx! and a tip of the hat to the local Bay Area F-body mailing list members, this amazing feat of grunt work was quickly accomplished over a two week period. Lift Day was 12/27/97 for those that just gotta know. Note the trick tilt bar we used, this was a huge help. 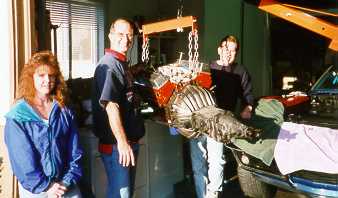 With the engine out and hanging on the hook, I was finally able to take a good look at the
rest of the engine bay for the first time.
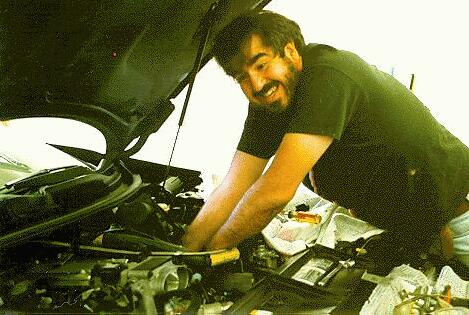
With the engine out and hanging on the hook, I was finally able to take a good look at the
rest of the engine bay for the first time.Not surprisingly, all the 28 year old front end bushings were shot, which also means the rear end bushing were also shot, so I elected to have Dave Herlinger at Herlinger Corvette Repair completely tear down and rebuild the suspension. Over time, it also became evident that the entire driveline needed attention as well, so Dave rebuilt the M21 and the rear end as well, plus installed all new U-joints and more. Details can be found below. Blackstone install a port matched Edlebrock Victor Jr. intake manifold topped with a custom DaVinci modified Holley 750 carburetor. Mike also selected a Comp Cams grind roller cam and roller lifters for the valve train, as well as porting the World Product S/R torquer heads I already have on the car. To keep the crank vibes under control, Mike installed an ATI p/n 917780 harmonic dampener. ARP bolts were used throughout the engine. You can read all about the engine build up here. I purchased an 11" Centerforce Dual Friction clutch for $249. Note this is HALF of what the CF DF clutch for my '95 Z28 cost! There are some cheaper parts out there after all. Stupid Problems I ordered a set polished billet pulleys for the engine. Might as well dress it up just a tad, but then... The Tiawanese aluminum billet water pump pulley turned out to NOT work worth a damn due to being seriously out of alignment with the crank pulley. I ended up having the stock pulleys powder coated black and installing them instead. They look just fine too. Sometimes aftermarket stuff just doesn't work as advertised, isn't that a surprise... More sniveling: The TWO sets of Hooker Super Comp headers I have bought don't clear the new widened oil pan I have on the engine. Hooker Q.C. is extremely poor, both of the Made in Mexico headers were bent very differently and neither one fit properly. Dave Herlinger had to cut 'n paste the tubes to get the darn headers to fit. From now on, I'm calling Jere Stahl and getting the right headers the 1st time. I have since sold the Hookers and installed Stahl sidepipes. Nothing beats getting it right on the third try right? Even MORE Sniveling: I bought a rebuilt GM aluminum water pump. Worked fine on the dyno (which force feeds the engine cold water). But... An eagle eyed customer at Dave's shop noticed that this particular water pump was designed for a serpentine belt drive on a later model Vette, with the impeller designed to rotate *backwards* from a normal, direct belt drive pump as used on my engine. Talk about a close call! Another call to Summit produced the correct aluminum Edelbrock pump for the engine. Minor clearancing (about .100" was milled off the top edge of the pump) was required to clear the stock pulley assembly, but other than that, it worked out fine. Turns out the high volume fuel pump I bought from Blackstone wouldn't work due to frame rail interference with the fuel line fittings, so yet another call to Summit was made and a proper Holley fuel pump was bolted on. That pump leaked oil due to a crappy housing and starved the carb in the turns, so finally an excellent Carter pump is now installed and working much better than the Holley pump ever did, and without leaking any oil. 3rd try's the charm once again, sigh... The ASCD L88 hood I bought going to require some shaving and some semi-serious re-work around the hood latches to fit properly. I should have purchased an Eklers hood instead. At least I'll get this one right after only 2 swings at the ball. Safety First I asked Dave to install a scatter shield made by Lakewood as required by NHRA rules (and good common sense!). It required some serious dialing in however to ensure it was properly concentric w/the crank. A mis-alignment of the scatter shield would mean the clutch and tranny would be at an odd angle to the flywheel, causing all sorts of expensive problems, so attention to detail here is critical. I've gone through 2 sets of motor mounts on this car since the Blackstone engine was installed. I'm done with that forever (I hope) and have installed a set of Moroso solid mounts. Vibration isn't at all bad, I was pleasantly surprised that the solid mounts aren't that big a deal compared to the rubber mounts. At least the new GM reproduction hood ornament and GM replacement gas tank fit the first time :-) Shocking Developments The stock engine bay wiring harness was moderately hacked up by the original owner. The MSD-6AL installation allowed me to remove the stock transistor ignition module and most of the hacked up wiring. This is a great improvement in both functionality and appearance, I assure you. Jacobs Electronics, makers of plug wires and electronic ignitions, was sold in '98 to a marketing company, which promptly moved the manufacturing facilities off shore to the Far East (Tiawan I think). I have used Jacobs plug wires successfully in the past on my Camaro, but... Having had a belly full of wallet draining crappy imported products, I have purchased a set of MSD 8.5mm plug wires to put on the engine instead. This of course means the entire ignition setup is now all MSD components, with an MSD 6AL ignition, Blaster II coil, Pro Billet Corvette tach drive distributor (p/n 8572) and of course the MSD spark plug wires. This is not a bad thing IMHO. Braking News The conversion to power brakes turned out to be a real PIA, as the entire driver side dash has to be removed to replace the manual brake + clutch pedal assm. with a power brake + clutch pedal assm scavenged from another car. Naturally, the hardened steel pin the clutch linkage connects to on the pedal was seriously worn on the new assembly, and Dave had to replace it. New calipers from Stainless Steel Brakes were installed, along with new front and rear brake lines. Dave resurfaced the rotors and installed new wheel bearings, along with a pair of new heavy duty rear spindles. The dash being all torn apart for the new pedal assembly installation led to a bit of "as long as we're in there" -itis, as I elected to replace both the speedo and tach cables and install all new light bulbs in the harness. Hopefully this will be the last time I'm in the dash for a looong time to come. Bum Steer The telescoping steering wheel had a couple of problems in it. It was difficult to get the wheel to move in and out and the horn would go off when the locking lever was loosened. Turns out the main cast iron cylinder (where the ignition switch and turn signal live) was cracked near the base, and a piece had fallen into the steering column proper. Potentially a very dangerous situation. I had the entire column rebuilt and the new cylinder repainted to match the Bright Blue interior. The manual steering box was also rebuilt, and a new rag joint was installed. The original ball joints were also replaced, as after 29 years they were totally worn out. Hot Headed The original owner had replaced the stock radiator and mechanical fan with a huge radiator from perhaps a '72 A/C equipped big block car and a pair of poorly installed electrical fans. He had to modify the stock support saddles to do so. That still didn't prevent me from finding that one of the original '186 heads on the car was cracked. The support modifications meant that a stock type '69 radiator wouldn't work. Since I have greatly increased the HP of the engine, I wanted to have a Griffin radiator installed to avoid a repeat of the head cracking problem the original owner had. The Griffin radiator we received was 1 inch "thicker" than the modified saddles on the radiator frame, despite Dave having phoned Griffin with the required dimensions. In the interest of saving time, Dave modified the saddles on the support to accept the new radiator. The original fan shroud being broken badly caused me to order a Griffon shroud and a new electrical fan assembly to replaced the poorly installed ones. Dave, being concerned about a single electrical fan failing, suggested that we install a mechanical flex fan to back up the electric fan, to which I agreed. The car never got over 180* with both the fans installed, so I elected to remove the flex fan and free up some power after reading a Hotrod Magazine article about how much power flex fans can consume. The car continued to run cool without the flex fan and I've yet to see north of 190* even in 100*+ summer heat. The big bonus was at the track where the car picked up almost .2s and 2MPH. That flex fan was costing the better part 20HP to spin, just like the magazine article predicted (which is stunning in itself, as the BS to reality level is pretty poor in most rags). Free power is Good Power :) Shafted Again In an attempt to beef up the drive train to the maximum strength possible, I asked Dave to use the large yokes on both the rear end and the Muncie M-21 so that the large Spicer non-lubed u-joints and a larger diameter drive shaft could be used. It read good in theory, as Dave did have a larger differential yoke in stock, but a good "large" Muncie output yoke couldn't be located. This caused a real problem, as now I had a small output yoke in the M-21, and a large input yoke in the differential, with a small diameter stock driveshaft setup for the smaller u-joints on both ends. The solution was a new 2.5" diameter balanced steel driveshaft from South Bay Driveline in San Jose. They were able to fabricate a brand new driveshaft with the required shaft ends and Spicer U-Joints for me in 2 hours(!). They also had a brand new NOS GM Muncie small yoke in stock, which I bought for a very reasonable price to replace my "ok, but it's getting tired" original. Rear End Rebuild Dave's specialty is in rebuilding suspensions and drivetrains. Dave rebuilt both the Muncie and the rear end. The M21 was actually in reasonably good condition, and the rear end still had the original gears and posi clutch pack in it. The ring gear is date stamped 3/69 and both the ring and the pinion gear are still in good condition. To handle the heavier torque and shock a hard hole shot the new engine will produce, Dave installed new gears, polished and stress relieved the carrier, installed new heavy duty spider gears and installed a new clutch pack using a beefier posi clutch stack than stock. That's as about bullet proof as you can make a stock '69 rear end. This is important to me, as I went through 3 set of gears in my Camaro before installing a Strange 12 bolt, and I'm tired of blowing up gear sets. Suspension Dave installed all new Bilstien shocks and F41 springs and bars on the car. Additionally, since I have hopes of running a 10" tire on a 17x9.5" Torque Thrust II wheel without flaring the fenders, I had Dave install new offset training arms and a Guldstrand shortened rear spring. I won't know for certain if the larger tires will clear until I order the wheels and tires sometime next year, but the measurements look like a pair of 275ZR40-17 Comp T/A tires on a 9.5" wheel with a 4.5" backspacing will fit. Misc Errata I originally ordered a Hurst Competition Plus shifter p/n 391-7992 for $135, along with an install kit p/n 373-8611 for $85 and a "fit pack" p/n 332-7302 for $11 to eliminate those loooong shifts from the stock shifter. Dave Herlinger convinced me to try the stock shifter with the rods setup on the short throw holes. This has the benefit of maintaining the reverse lockout feature, and keeping the cockpit stock. Good in theory once again, but the stock shifter just doesn't cut it. The Hurst went in and I'm much happier with the precision shifts the Hurst delivers. Are we having fun yet? ;-) Check back here occasionally, as I will be posting more photos, manufacturer links and build information as the project progresses.  Click to E-mail me  Back to Allen's Shark Page |